# Adding Cards
In this section we will go over how to add the required cards to make the calculation function.
# Inputs
First thing we need to do is define all the inputs the user will need. We are trying to define the equation . To find we need to define the inputs , , and .
To add your first input, click the green plus icon below the outline card, this will display a dropdown of different types of cards you can add to your calculation. Click "Add an input" and then finally "Decimal number"
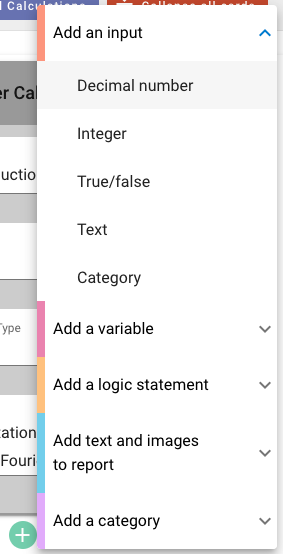
This will add a decimal input card below the outline card.
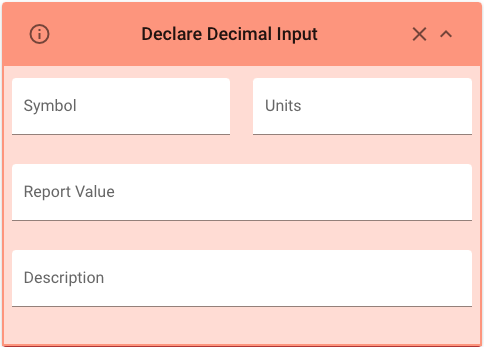
We will fill this card in for first
# Symbol
This field is used to define what symbol will be shown in reports when using this input. We can use any KaTex function here (opens new window), so to write we will write {\Delta}T in this field.
# Units
The units defined here will be displayed whenever this input is used in your calculation. For we will use the units . This field also accepts KaTex functions (opens new window) so we will write {\degree}C
# Report Value
The report value is an example value to use whilst you are working on your calculation. As the user of your calculation will be inputting their own value for this, they will never see what you put here. For this example we will use the value 10.
# Description
As with the outline card, the description is used to give context to what the input is doing. By default, it is set to A blank description, but we want to put something more useful than that. Set your description to Temperature difference over the body
# Repeat
Your page should now look like this
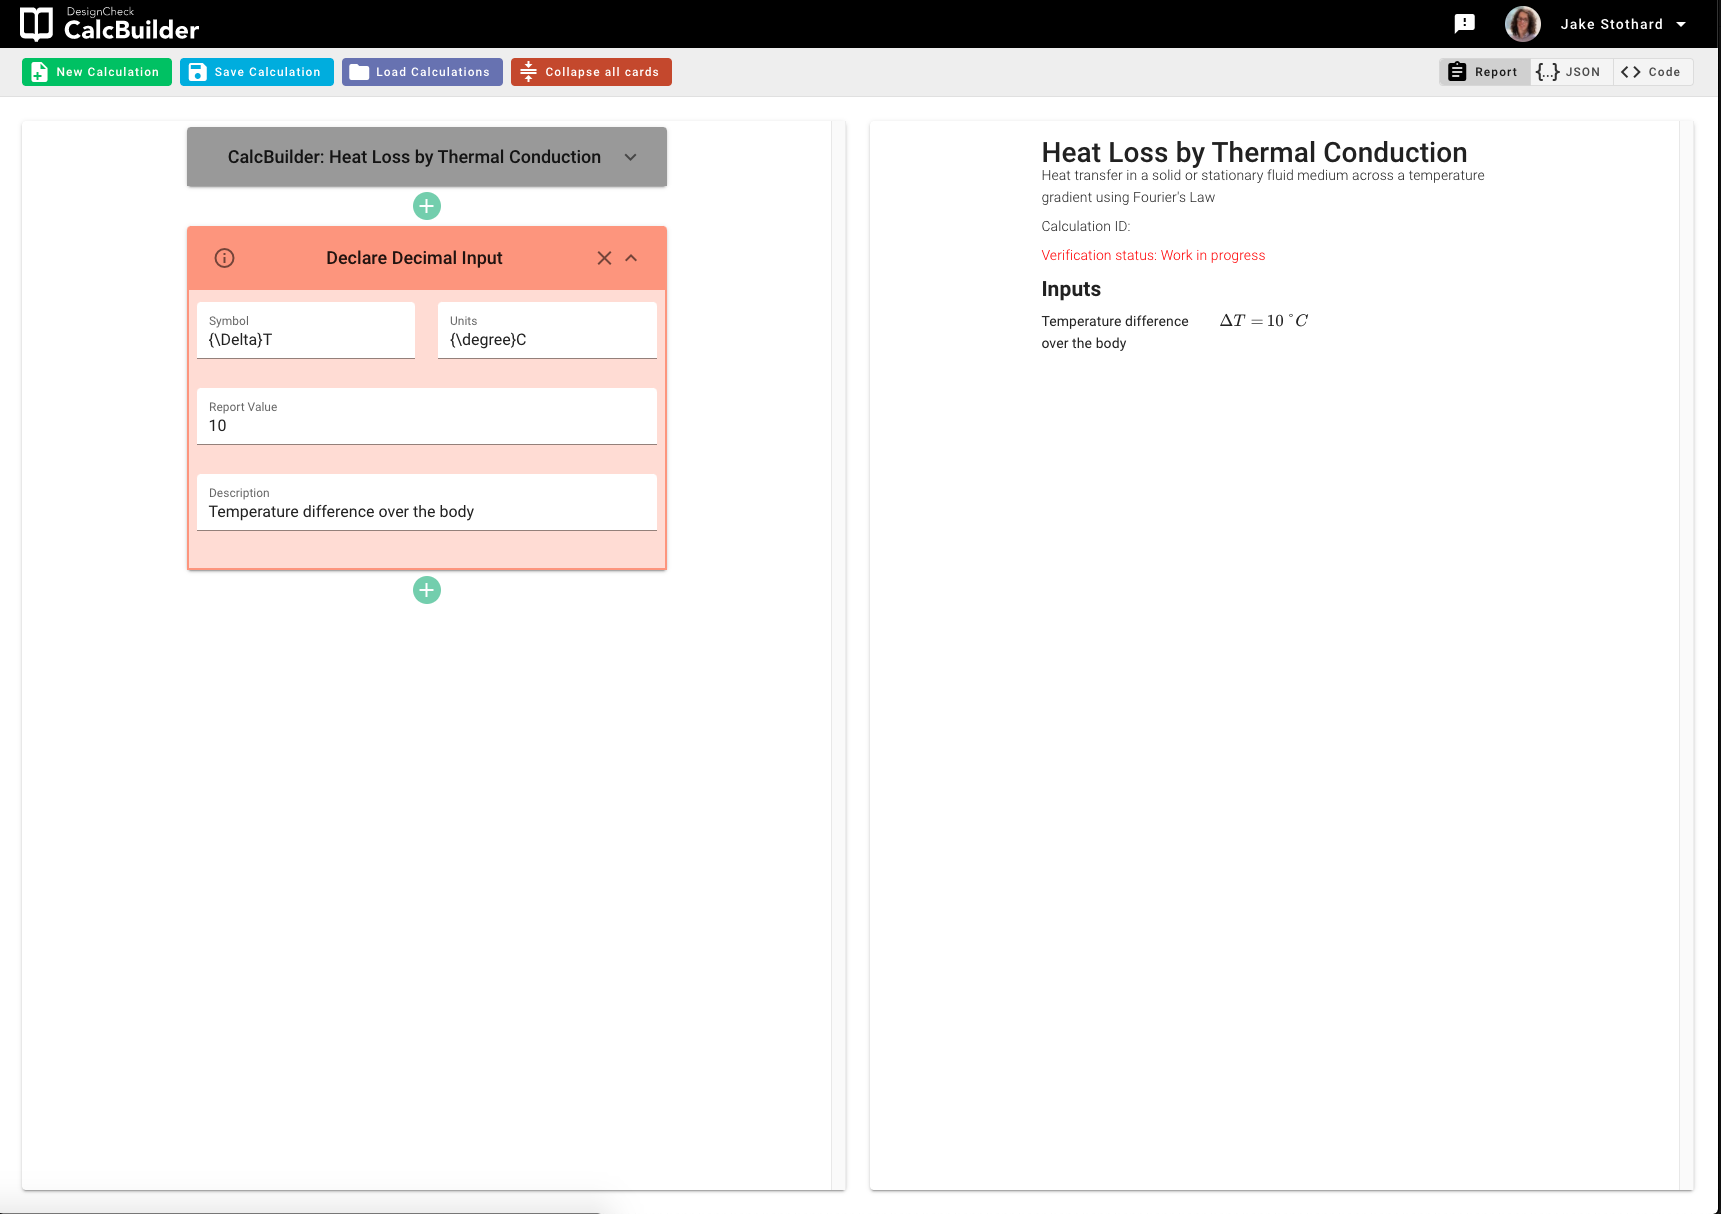
That's one of the inputs defined, now we just have to do the same for the other three. Repeat the above steps for the other three variables using the values defined in the below table
| Input | Symbol | Units | Report Value | Description |
|---|---|---|---|---|
| k | W/(m{\degree}C) | 70 | Thermal Conductivity | |
| A | m^2 | 1 | Heat transfer area | |
| {\Delta}T | {\degree}C | 10 | Temperature difference over the body | |
| {\Delta}x | m | 0.05 | Distance of heat transfer |
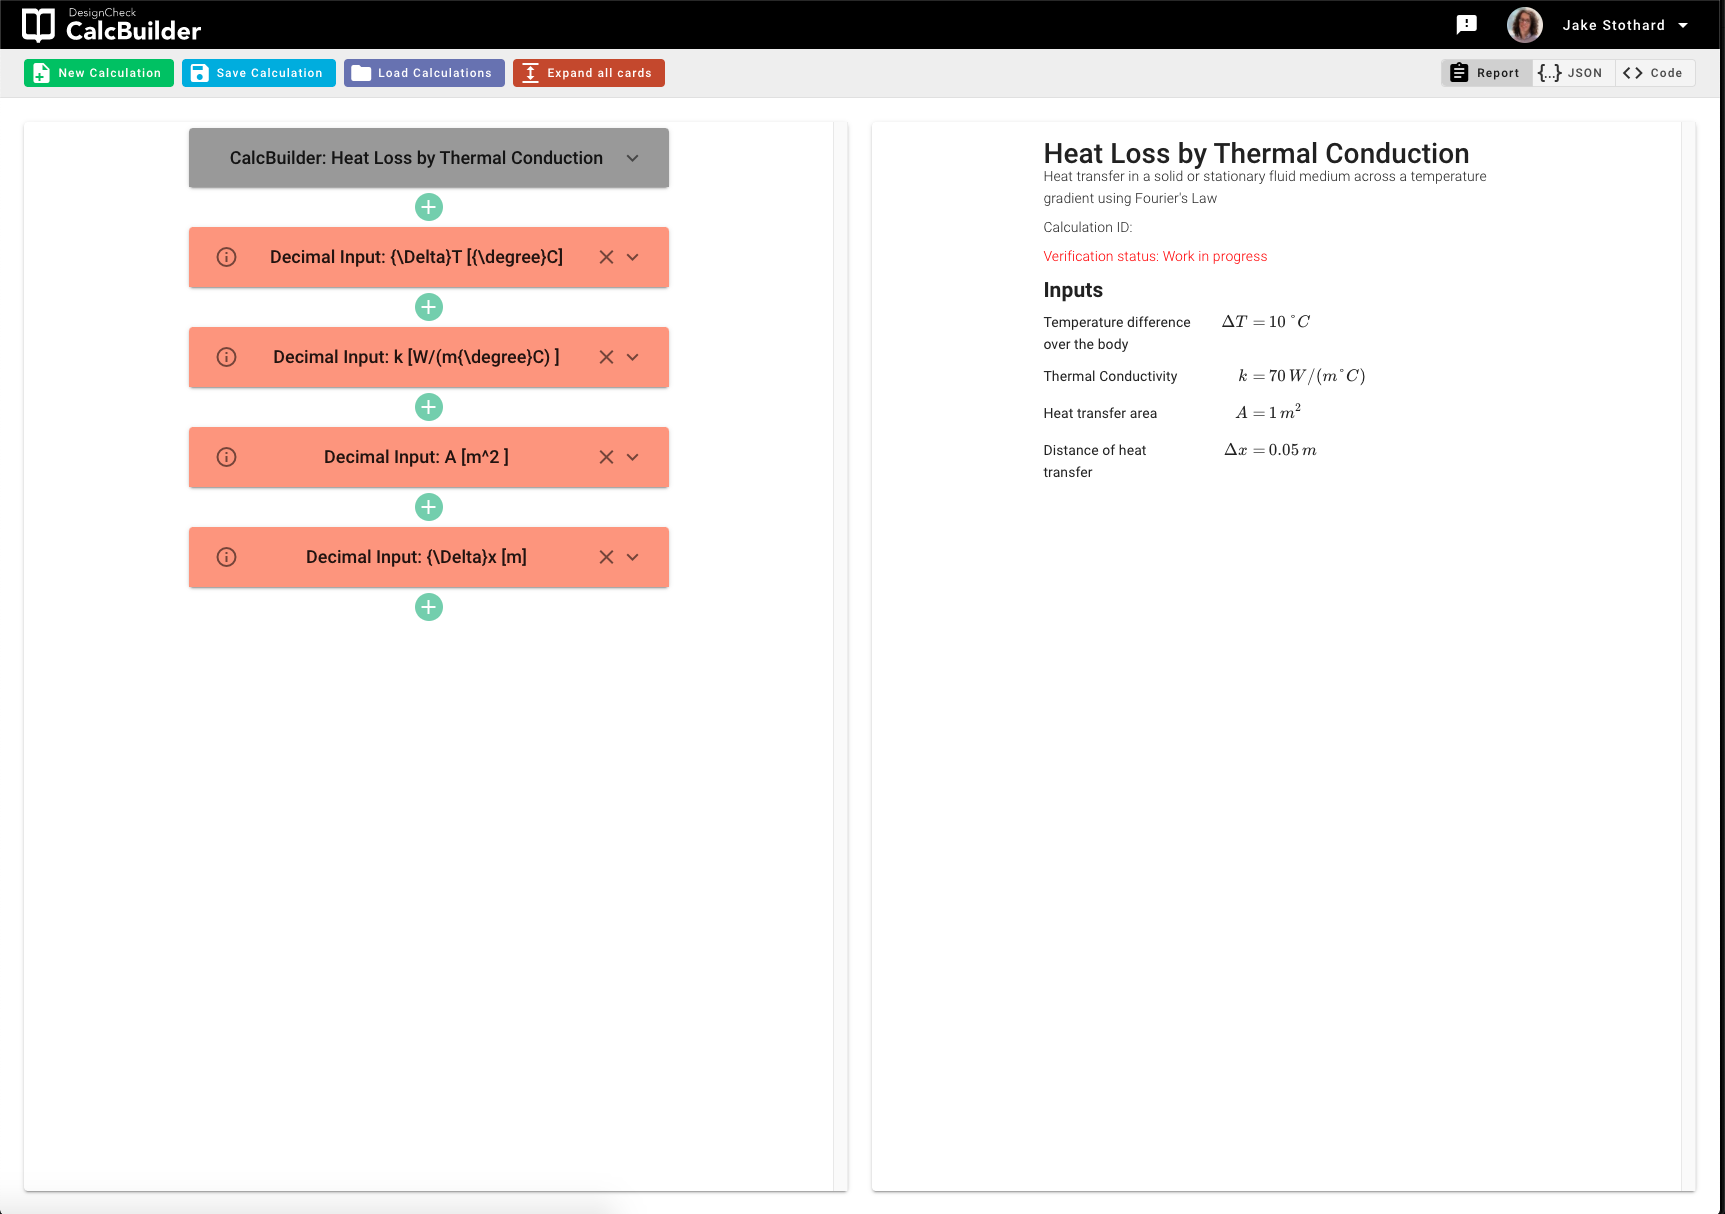
Once you have filled all this in you can make your calculation easier to read by clicking the "Collapse all cards button"
This will leave you with a calculation that looks something like this
# Calculation
Now that we have all our required inputs defined, we can start to construct our calculation. To do this, we will click the green plus at the bottom of our calculation followed by 'Add a calculation' and then 'Calculate a variable'.
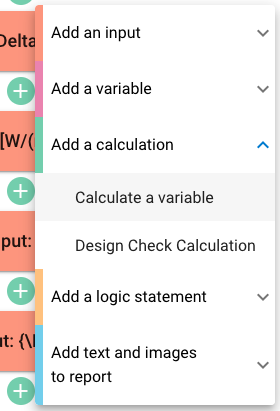
This will add a calculation card at the bottom of your calculation.
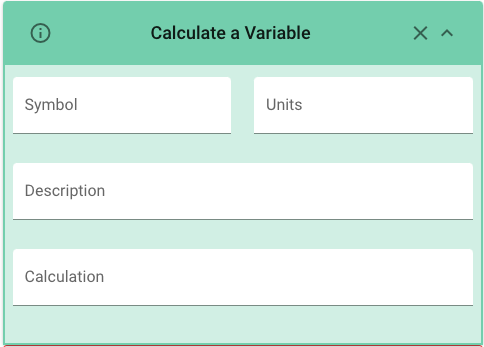
We will fill this card in for our calculation
# Symbol
This field is used to define what symbol will be shown in reports when using this calculated variable. We can use any KaTex function here (opens new window), so to write we will write q_x in this field.
# Units
The units defined here will be displayed whenever this calculated variable is used in your calculation. For we will use the units . so we will write W.
# Calculation
The calculation field is used to define how we calculate this variable. There are many available functions for this field that will help you to define your calculations accurately.
For our equation , we will define the calculation by using: (k*A*{\Delta}T)/{\Delta}x
# Description
The description is used to give context to what the calculated variable is doing. By default, it is set to A blank description, but we want to put something more useful than that. Set your description to Heat loss over the body
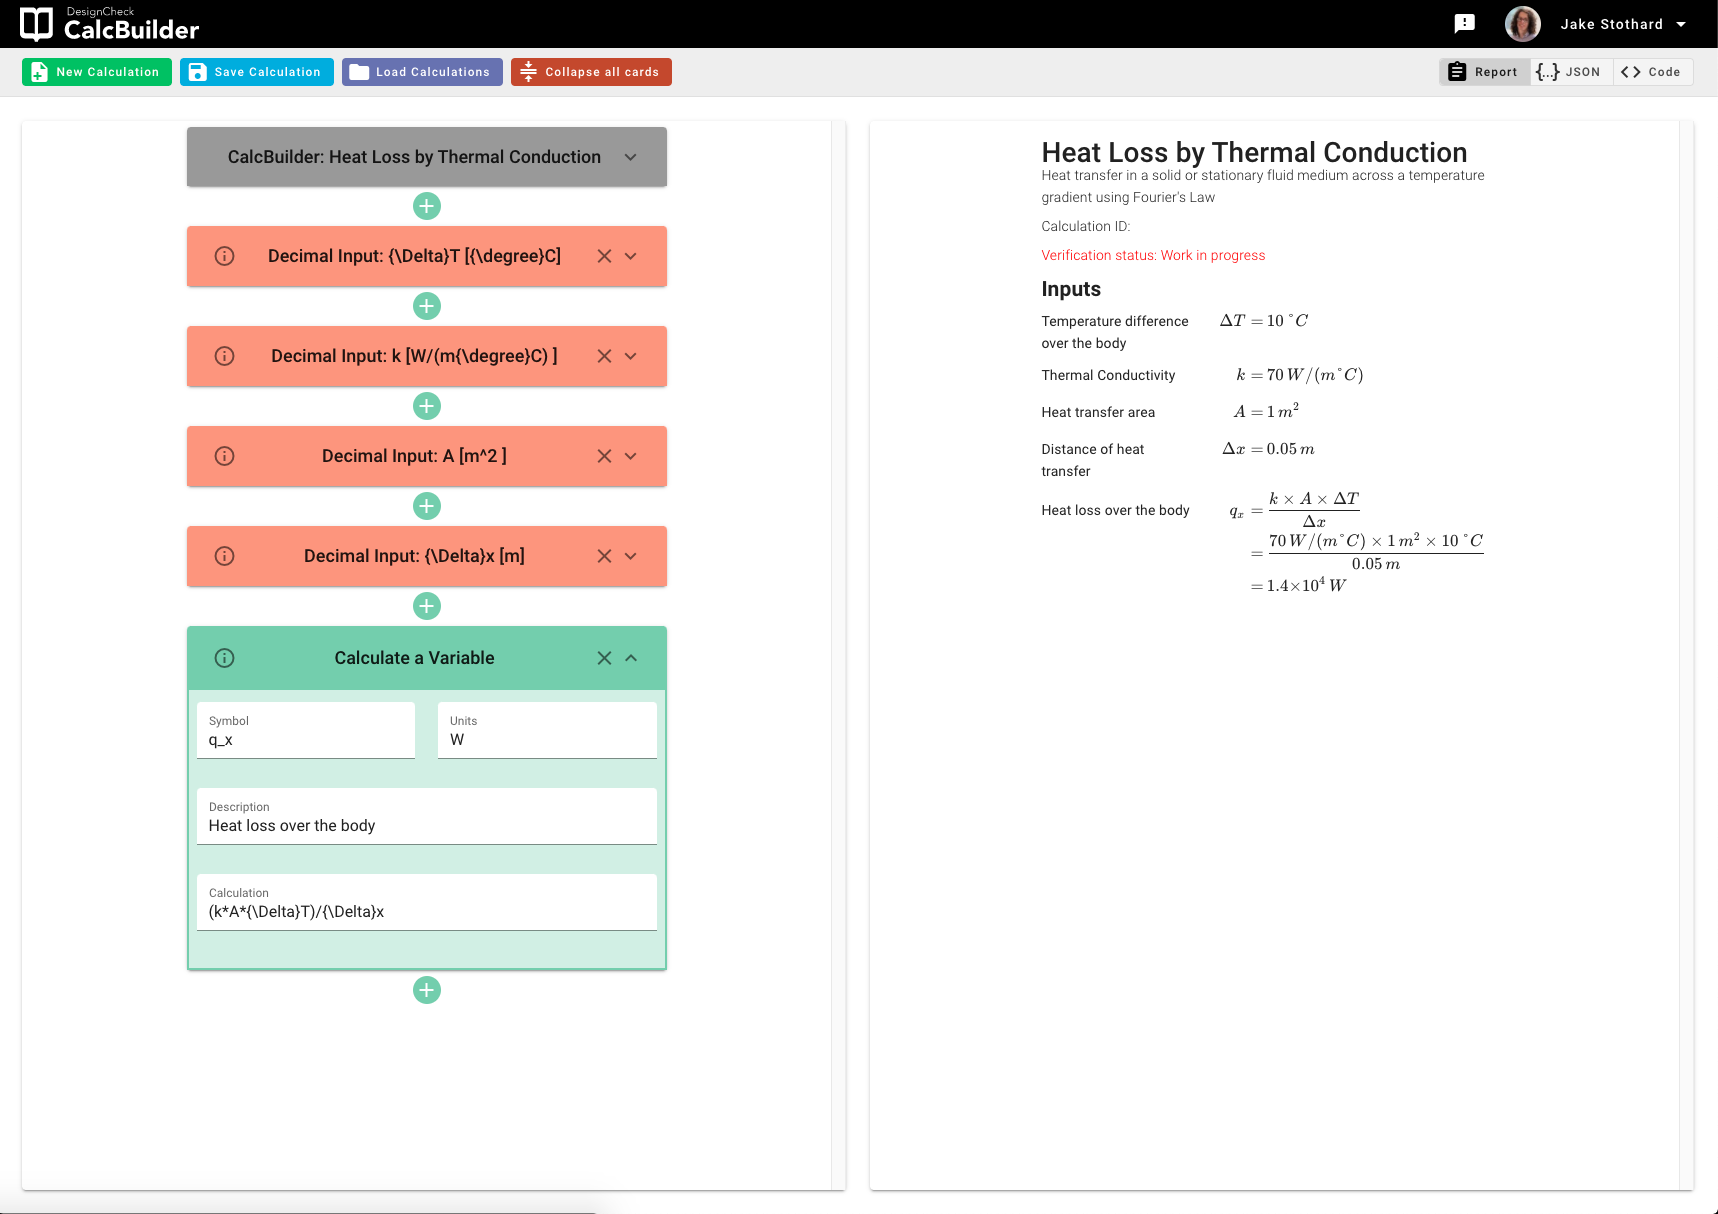
This should leave you with a calculation that looks like this
# Result
Once you have completed your calculation you will want to return the result. This will ensure that when your calculation is being used i.e. in Excel, you will get a result returned to you.
To add your result, click the green plus icon at the bottom of your calculation, then you want to click "Add a result" and then finally "Calculated result"
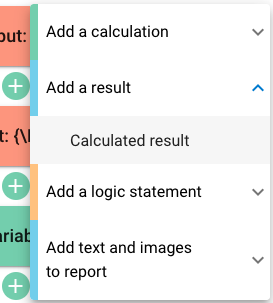
This will add a result card to the bottom of your calculation.
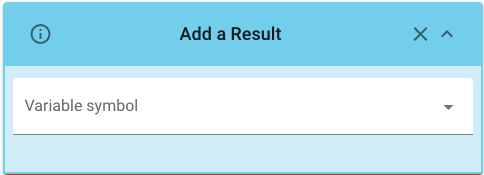
Finally, we just want to select the variable we just calculated from the dropdown list. Click "Variable symbol" and select "q_x".
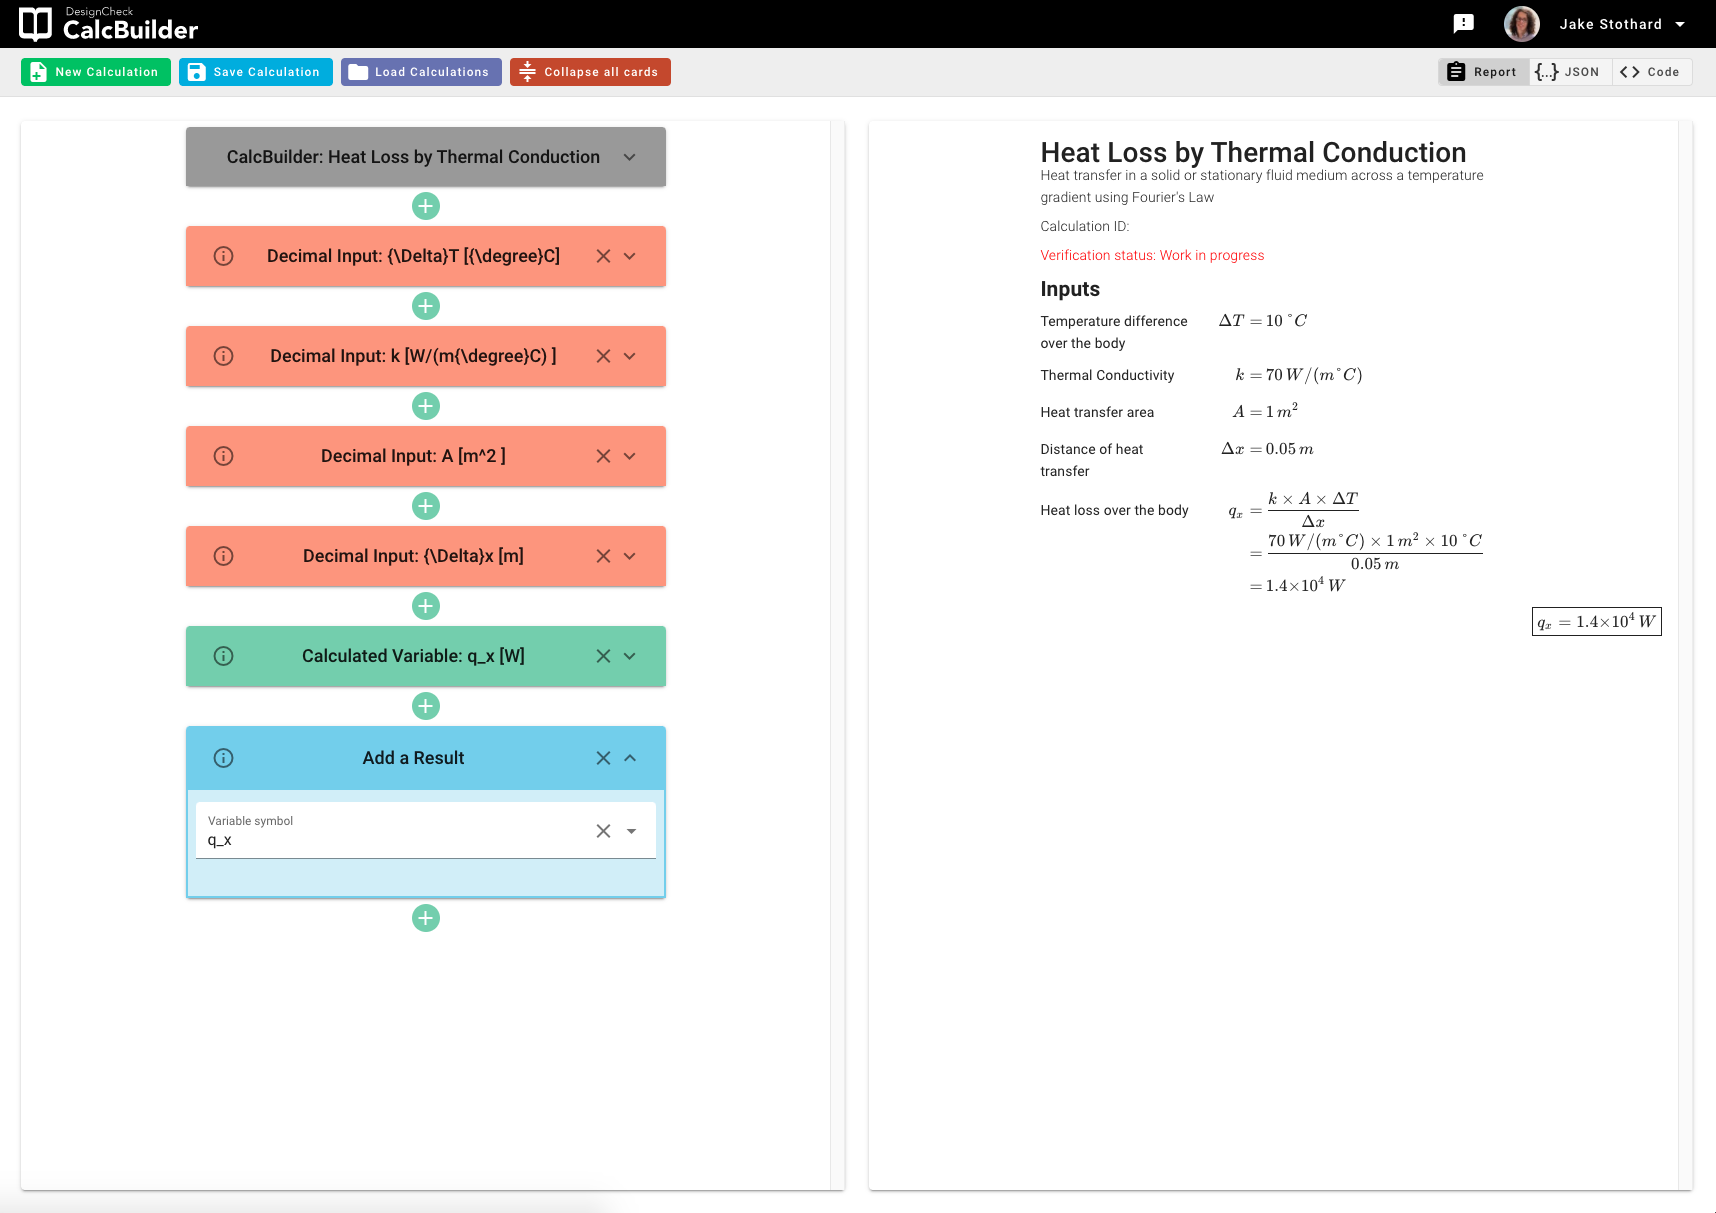
You have now created your first calculation! In the next section we will go over how we can publish our calculation and use it on Arup Compute (opens new window)